
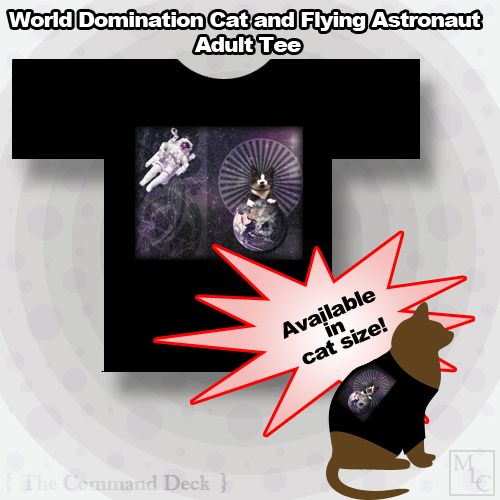
So you want to make a space photo with epic clips of cats, planets, and your favorite things in it, do you? Remember this? Here’s how I made the base image.
The first step is to gather your images. Wikipedia, NASA, and US government sources are my favorite resources. Why? Wikipedia lists the copyright information when you click on an image (plus, it’s a great way to find images), and most NASA/GOV images are in the public domain because they are usually taken by a government employee while on duty.
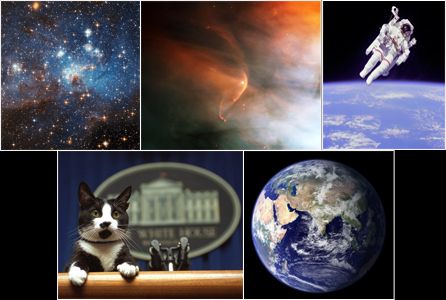
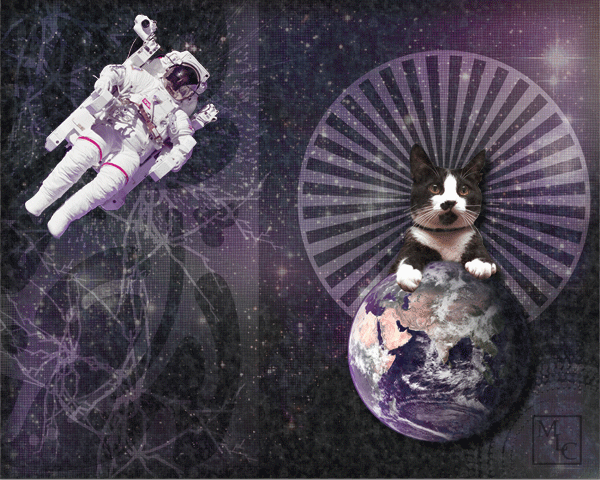
All right! We have our background base image, a beautiful image to enhance it with, and our items (astronaut, planet, and cat).
Open photoshop (or your graphics program of choice). Create a new document with your desired dimensions. World Domination Cat and Flying Astronaut is 1,000 by 800 pixels (or 14in by 11in) with a 72 resolution (you won’t need to worry about that; 72 is the most common for web images).
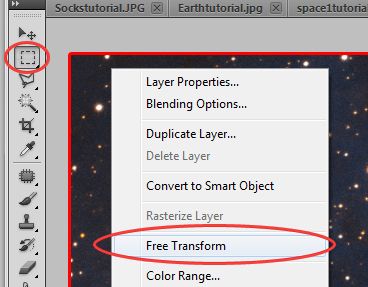
Open your images. Select the image you are going to use as the background and press the Ctrl and A keys. It will create a dotted line around the image. Press the Ctrl and C keys to copy it.
Paste that image onto your blank document by pressing the Ctrl and V keys. If your background image doesn’t fit properly, resize it by selecting the Rectangular Marquee Tool (the dotted box) on the left side of your screen. Once the tool’s options box appears, select Free Transform.
Lines with tiny boxes at each corner of the image will appear. Pick a corner and drag it around until you get the size you want. Tip: If you press the Shift and Alt keys while you drag a corner, it will keep the image’s original ratio intact. Wut? It means that your image won’t end up having a stretched or squished appearance!
Now you have your background!
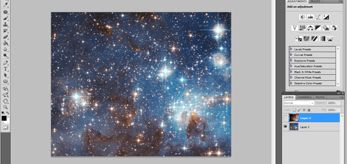
If you are going to use an image to enhance the background, follow the same steps and paste/resize the image over the background. The cool thing about most graphics programs is that they allow you to modify the transparency/look of individual layers.
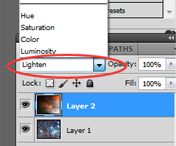
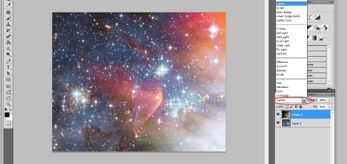
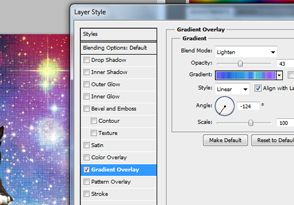
Play with the options shown in the picture above until you are satisfied with the look. I started out with Lighten. You can change the look of the second layer anytime. I usually go through several changes throughout the entire photo manip process before I am happy with it.
Adding the astronaut, cat, and planet
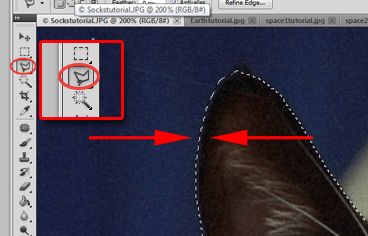
Select one of the add-on images (we are going to start this off with Socks the cat).
Select the Polygonal Lasso Tool and, using your mouse, start clicking and dragging it around Socks. It’s sort of like cutting something out of a catalog. Drag, click, drag, click. DO NOT DOUBLE CLICK! I cannot stress that enough! Double clicking will close off your selection, and you’ll have to start over.
Once you’ve dragged and clicked your tedious way around Socks, you may give into your mouse’s urge to double click. If the selection disappears on accident, go to “Edit” then “Undo,” and the selection will reappear. Follow the copy/paste procedure and paste it onto your background. Repeat this process for the other objects.
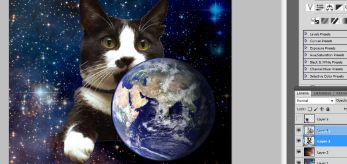
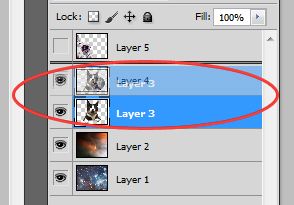
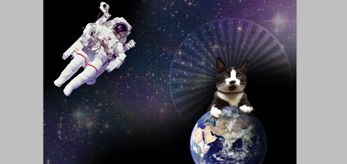
Bring Socks to the front. Since we started with Socks, he appears under the Earth layer (as shown). To bring him above that layer, just click and drag his layer to the top (as shown below).
Oh noes! Socks doesn’t look right!
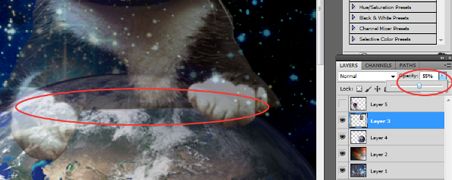
We want Socks have his paws over the world, but it doesn’t exactly work when the rest of his body shows up. Position him where you want him, select his layer, and change the opacity from 100 to 50 (as shown above).
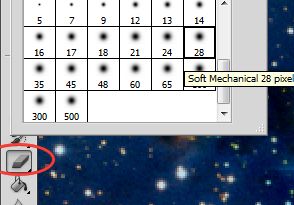
Now that you can see where the Earth curves, you can start erasing the area between his paws. Select the eraser tool. I usually like to use one of the softer brushes (if you make a mistake, it’s harder to spot!). With your finger pressing the mouse’s left button, drag the brush over the areas you want to erase. When you are done, change his opacity back to 100.
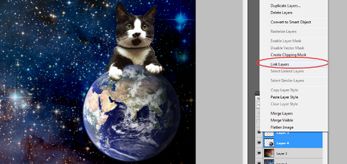
Link the Socks and Earth layers (this comes in handy when you start moving objects around. Linking them allows them to be moved with one stroke). Select the Earth and Socks layers at the same time by holding down the Shift key and clicking on them. Once they are selected, right click and select Link Layers.
Notice how I toggled the appearance of the background again? I do this a lot before I’m satisfied!
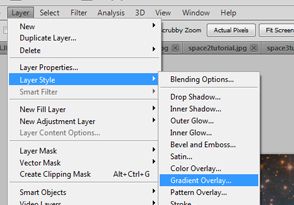
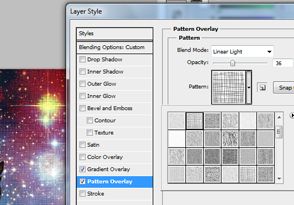
Once you have all of your objects in place and cleaned up, it’s time to mess around with styles and special effects! Give that background an awesome makeover! You can add patterns, gradients, colors, and much more (to change layer styles, go to Layer > Layer Style > Pattern Overlay/Gradient Overlay/Color Overlay)! The pictures below give you an idea:
When you are happy with the background, start adding some shapes, text, and other odds and ends. Photoshop has some nifty pre-made shapes at your disposal.
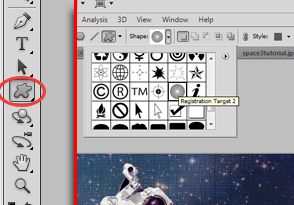
Select a shape and put it onto your picture by clicking and dragging (photoshop will automatically create a new shape layer). Play around with the opacity and properties until you are happy with it.
Make the background even more epic by adding new layers. In the above image, I added a a shape (the halo/circle behind Socks) and a new layer (Layer > New >Layer). For the new layer, I used a large, soft black brush in areas I thought were too bright. I then toggled with its appearance.
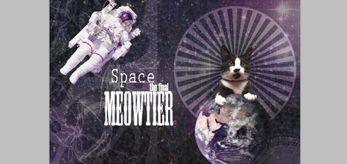
Using the techniques in this tutorial, I added another brush layer to give it a grunge feel, another shape with a low opacity, and some text. If you want to add text, just click the text tool (the large T) on the left side of the screen. It will allow you to change fonts, sizes, and colors.
Once you are happy…
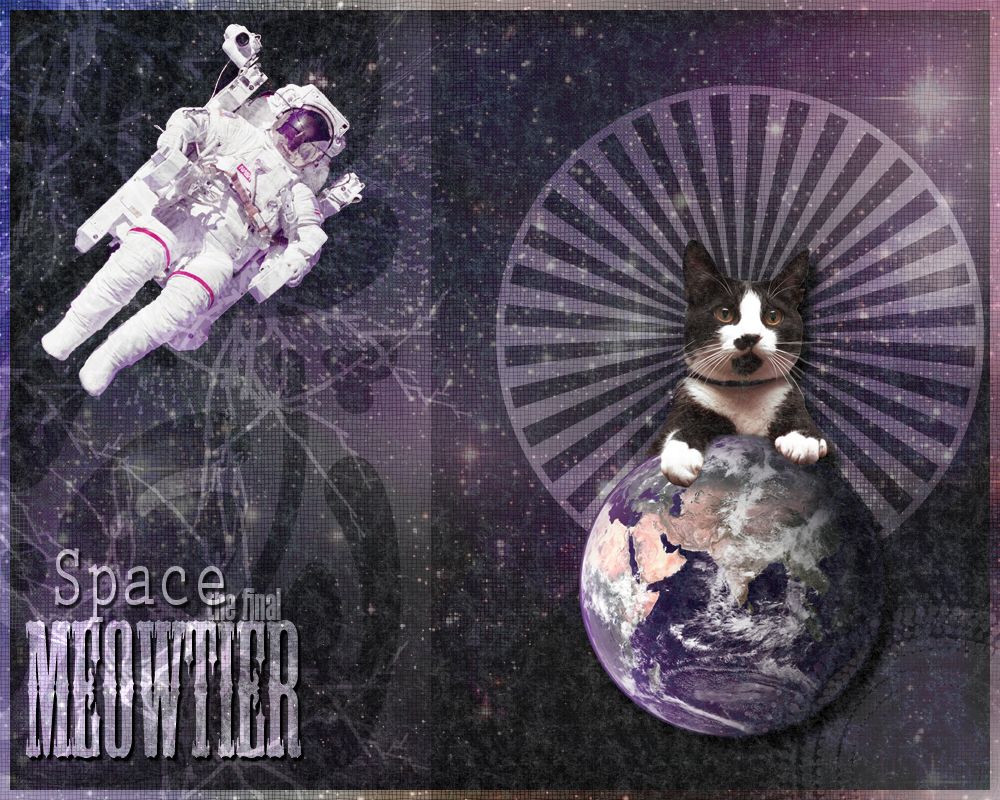
You can even take it one step further if you like exploring the options in graphics programs!


Pretty cool..